The aesthetic appeal and functionality of a room often lie in the finer details — elements that one might overlook. One such element is cabinet hardware.
While these small details don’t seem as important at first, they often play a dual role.
They merge utility with design, and often becoming the unsung heroes in the décor of any space.
Benefits of Installing Cabinet Hardware
The Influence of Cabinet Hardware
Consider this: you’ve just remodeled your kitchen or bathroom.
Everything looks fresh and lovely —the countertop is gleaming, the paint is fresh, but it still doesn’t feel complete.
Often, it’s the outdated or out of place cabinet hardware that often keeps the space from feeling incomplete.
Simply changing these tiny fixtures can dramatically transform the look of a space, similar to adding the perfect accessory to an outfit.
An Affordable Upgrade
When it comes to home renovations, budget constraints are a common concern.
Yet, here’s where cabinet hardware shines brightly.
It offers homeowners and designers an avenue to uplift a space without incurring the costs of a full-fledged renovation.
A simple switch of knobs or handles can introduce a modern twist, a vintage charm, or even a splash of color.
Ease of Transformation
For those who’re hesitant about embarking on DIY projects, the installation of cabinet hardware is an excellent starting point.
If you have some tools and can take your time, you can do it. And the best part?
You’ll see the change right away and it’ll feel great.
Selection of Appropriate Hardware
Making a choice in cabinet hardware is more than just picking out something that looks nice.
It’s about understanding the intricate balance between aesthetics, functionality, and the environment it is placed in.
Here’s an expanded view on how to navigate the different options:
Types of Cabinet Hardware
- Knobs: These are small, typically round, and are attached to the cabinet door or drawer with a single screw.
Knobs come in a variety of shapes, not just round, including square, oval, rectangle, and even novelty shapes. - Pulls and Handles: These are generally larger than knobs and attached with two screws.
They can span from contemporary bar handles to traditional swing handles.
The size can vary, and they can be used on both cabinet doors and drawers. - Bin Pulls: Also known as cup pulls, they are a popular choice for drawers, offering a semi-circular opening for fingers, lending a vintage appeal.
- Backplates: These can be used behind a knob or pull to add a decorative finish, protect the cabinet finish, or cover existing holes.
Also Read: Modern Cabinet Knobs – Top Trends & Ideas To Try In 2023
Material Considerations:
Metal: Options include brass, bronze, stainless steel, and nickel.
The choice of metal can significantly influence the look, from shiny polished chrome for a modern feel to oil-rubbed bronze for a more rustic or vintage look.
Glass or Crystal: These lend a classic, vintage charm and can brighten up a space by reflecting light.
Ceramic or Porcelain: Often used in traditional or country-style homes, these offer a touch of delicacy and can come in various painted designs.
Wood: Wooden pulls or knobs can either be stained or painted, providing a warm, organic touch to the cabinets.
Aesthetic Compatibility:
Ensure that your chosen hardware complements the style of your cabinets.
For instance, sleek, stainless steel bar handles might look out of place on rustic, wooden cabinets, just as ornate, brass knobs might clash with ultra-modern cabinet designs.
Consider the room’s color scheme.
Hardware in contrasting colors can pop, while harmonizing colors can offer a more cohesive look.
Functionality and Ergonomics:
Think about how the hardware feels in your hand. If it’s going to be used frequently, comfort is paramount.
For drawers that store heavy items or large pots and pans, larger handles that can be gripped with the whole hand may be preferable.
Scale and Proportion:
The size of the hardware should be in proportion to the size of the cabinets.
Oversized knobs might overpower small cabinet doors, while tiny knobs can look lost on large cabinet doors or drawers.
Ensure the hardware doesn’t impede the functionality of adjoining cabinets or appliances.
For instance, a handle shouldn’t protrude so far that it interferes with an adjacent appliance or door.
Essential Tools and Materials:
When undertaking any installation project, having the right tools and materials is fundamental.
With cabinet hardware, precision, and the right approach are key. Here’s a comprehensive breakdown of the essentials and why they matter:
Tools:
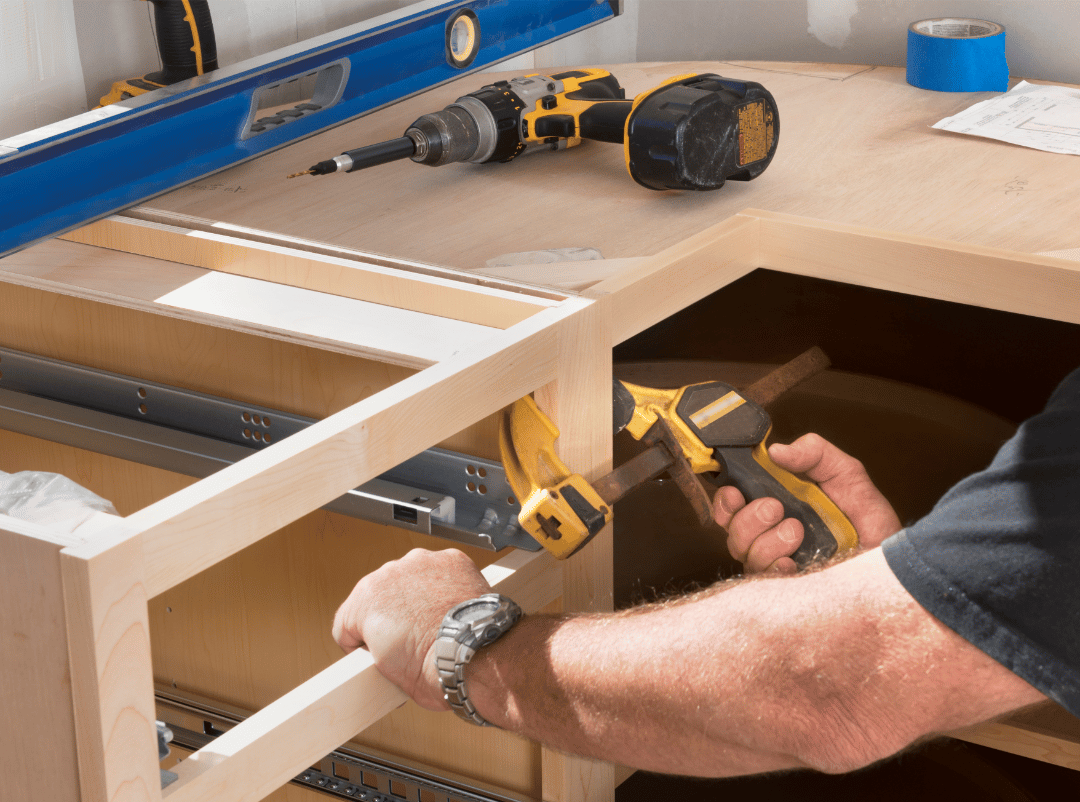
Screwdriver: A basic yet indispensable tool. While manual screwdrivers are sufficient for small tasks, consider using a powered screwdriver or a drill with a screwdriver bit for larger projects to expedite the process.
Drill: If your cabinets don’t come with pre-drilled holes or if you’re changing the style of the hardware (for instance, moving from a knob to a handle), you’ll need a power drill.
Along with this, a set of drill bits of varying sizes is crucial to ensure you can make holes of the correct size.
Measuring Tape: Precision is paramount when installing cabinet hardware.
A measuring tape will help ensure consistent placement of the hardware, particularly if you’re installing on multiple cabinets.
Pencil: A simple pencil is perfect for marking the spots where you intend to place the hardware.
It’s vital to mark accurately, as it determines the placement of your hardware.
Level: Especially important when installing handles or longer pulls, a level ensures that your hardware is perfectly horizontal or vertical as required.
Materials:
Screws: While most hardware comes with accompanying screws, it’s always a good idea to check the length and ensure they’re appropriate for your cabinet’s thickness. Having a few extra screws on hand is wise, in case any get damaged or stripped during installation.
Anchors: In some cases, particularly with heavier hardware or with doors made from softer materials, wall anchors may be necessary to provide additional support.
Templates: These are incredibly beneficial for consistent hardware placement, especially across multiple cabinets. A template ensures symmetrical alignment and can save a significant amount of time. Some hardware stores sell templates, or you can make your own using cardboard or plastic.
Masking Tape: Placing a piece of masking tape over the area you plan to drill can help prevent the surface from splintering.
Wood Filler: If you’re updating existing hardware and the new hardware doesn’t align with the old holes, wood filler is essential to fill in any unwanted holes before installing the new pieces.
Systematic Procedure for Installing Cabinet Hardware:
The installation of cabinet hardware requires meticulous attention to detail to ensure a seamless and professional outcome. Follow this detailed procedure to achieve optimal results:
Step 1: Preparing and Cleaning the Surface
Inspection: Before beginning the installation, thoroughly inspect the cabinet surface for any pre-existing holes, blemishes, or uneven areas. These could interfere with the installation or the final appearance.
Cleaning: Use a mild detergent or a gentle cleanser to wipe away any grease, grime, or dust. A clean surface ensures better adherence and prevents complications during installation. Ensure the surface is completely dry before progressing.
Old Hardware Removal: If updating or replacing hardware, use a screwdriver to remove the old knobs or pulls. Fill in any undesired holes with wood filler and allow it to dry before sanding it smooth.
Step 2: Measuring and Marking for Placement
Consistency: It’s crucial that all hardware is consistently placed across all cabinets and drawers. Decide whether you want your knobs or handles closer to the top, bottom, or center of the cabinet door or drawer front.
Measuring: Using a measuring tape, find and mark the exact spot where you want your hardware to sit. For handles and pulls, measure both the start and end points.
Templates: If you’re installing hardware on multiple cabinets, a template will be invaluable for consistent placement. Align the template with the edge of the cabinet and mark the drilling points.
Step 3: Drilling Holes
Safety First: Wear safety goggles to protect your eyes from any wood shavings or debris.
Prevent Splintering: Place masking tape over your marked points. This can help minimize wood splintering when you begin to drill.
Drilling: Start with a smaller drill bit than required to create a pilot hole. Then, switch to the appropriate size for the final hole, ensuring it’s large enough for the screws but not so large that the hardware sits loosely.
Step 4: Fixing the Hardware
Positioning: Insert your screws from the inside of the cabinet or drawer, ensuring they poke out of the drilled holes. Position your knob or handle over the protruding screws.
Tightening: Using a screwdriver (manual or powered), tighten the screws until the hardware is firmly in place. Avoid over-tightening as this can damage both the hardware and the cabinet surface.
Step 5: Ensuring Alignment and Functionality
Alignment: For handles and pulls, use a level to ensure they are perfectly horizontal or vertical, as needed. Even slight misalignments can be noticeable across multiple cabinets.
Functionality Test: Open and close the cabinet or drawer multiple times to ensure the hardware doesn’t loosen and functions smoothly without any obstructions.
Professional Insights: Elevating Your Cabinet Hardware Installation:
Even if you’re armed with all the necessary tools and a clear guide, the finer nuances of cabinet hardware installation can be the defining line between a satisfactory job and a stellar outcome. Here are some invaluable insights:
Techniques for Symmetrical Placement:
Laser Level: Using a laser level can significantly simplify the task of ensuring symmetrical hardware placement, especially across a long stretch of cabinetry.
Ensure the laser line runs consistently where you want your hardware, marking the exact spots for drilling.Uniform Measurement: Instead of measuring each cabinet individually, determine a consistent measurement from a reference point, like the top or bottom of the cabinet, for the hardware placement.
This ensures every piece sits at the same height.Photocopied Template: For consistent spacing, especially if you have a lot of cabinets, create a template on paper.
Once satisfied with the positioning on one cabinet, photocopy the template for repeated use, ensuring uniformity.
Addressing Common Challenges:
Misaligned Holes: Should you drill a hole slightly off where it should be, don’t fret. Fill the hole with wood filler, let it dry, sand it down smooth, then repaint or finish as necessary. Measure again more carefully and re-drill.
Damaged Surfaces: If a cabinet surface gets scratched or damaged during the installation process, depending on the material, you can either use a touch-up pen, wood filler, or a small amount of matching paint to rectify the issue.
Adjustable Handles: Some handles come with adjustable bases to allow for minor position corrections without the need to drill new holes. These can be beneficial if you’re replacing old hardware and the new handle’s screw points don’t align perfectly with the old ones.
Maintenance and Upkeep:
Regular Cleaning: Over time, cabinet hardware can accumulate dirt, grime, and fingerprints, especially in high-touch areas like the kitchen.
Use a gentle cleaning solution or simply soapy water, and a soft cloth to wipe them down.
Avoid abrasive cleansers which can scratch or degrade the finish.Tightening Over Time: Depending on usage, screws can become loose over time.
Every few months, give each piece of hardware a slight wiggle to check its stability.
Tighten any loose screws promptly to avoid long-term wear and tear or damage.Protective Finishes: If your hardware is prone to tarnishing (like some untreated metals), consider applying a protective sealant or finish.
This not only maintains the shine but also extends the life of the hardware.Swapping for Seasons or Events: One of the beauties of cabinet hardware is its ease of replacement.
For those keen on regularly refreshing their home’s aesthetic, consider having sets of hardware for different seasons or special occasions.
Swapping them out can instantly offer a fresh look to a room.